How to create a manual backup
EssentialTrigger an immediate on-demand backup of any WordPress site from the WP Warden dashboard.
-
Option A — From the Backups page
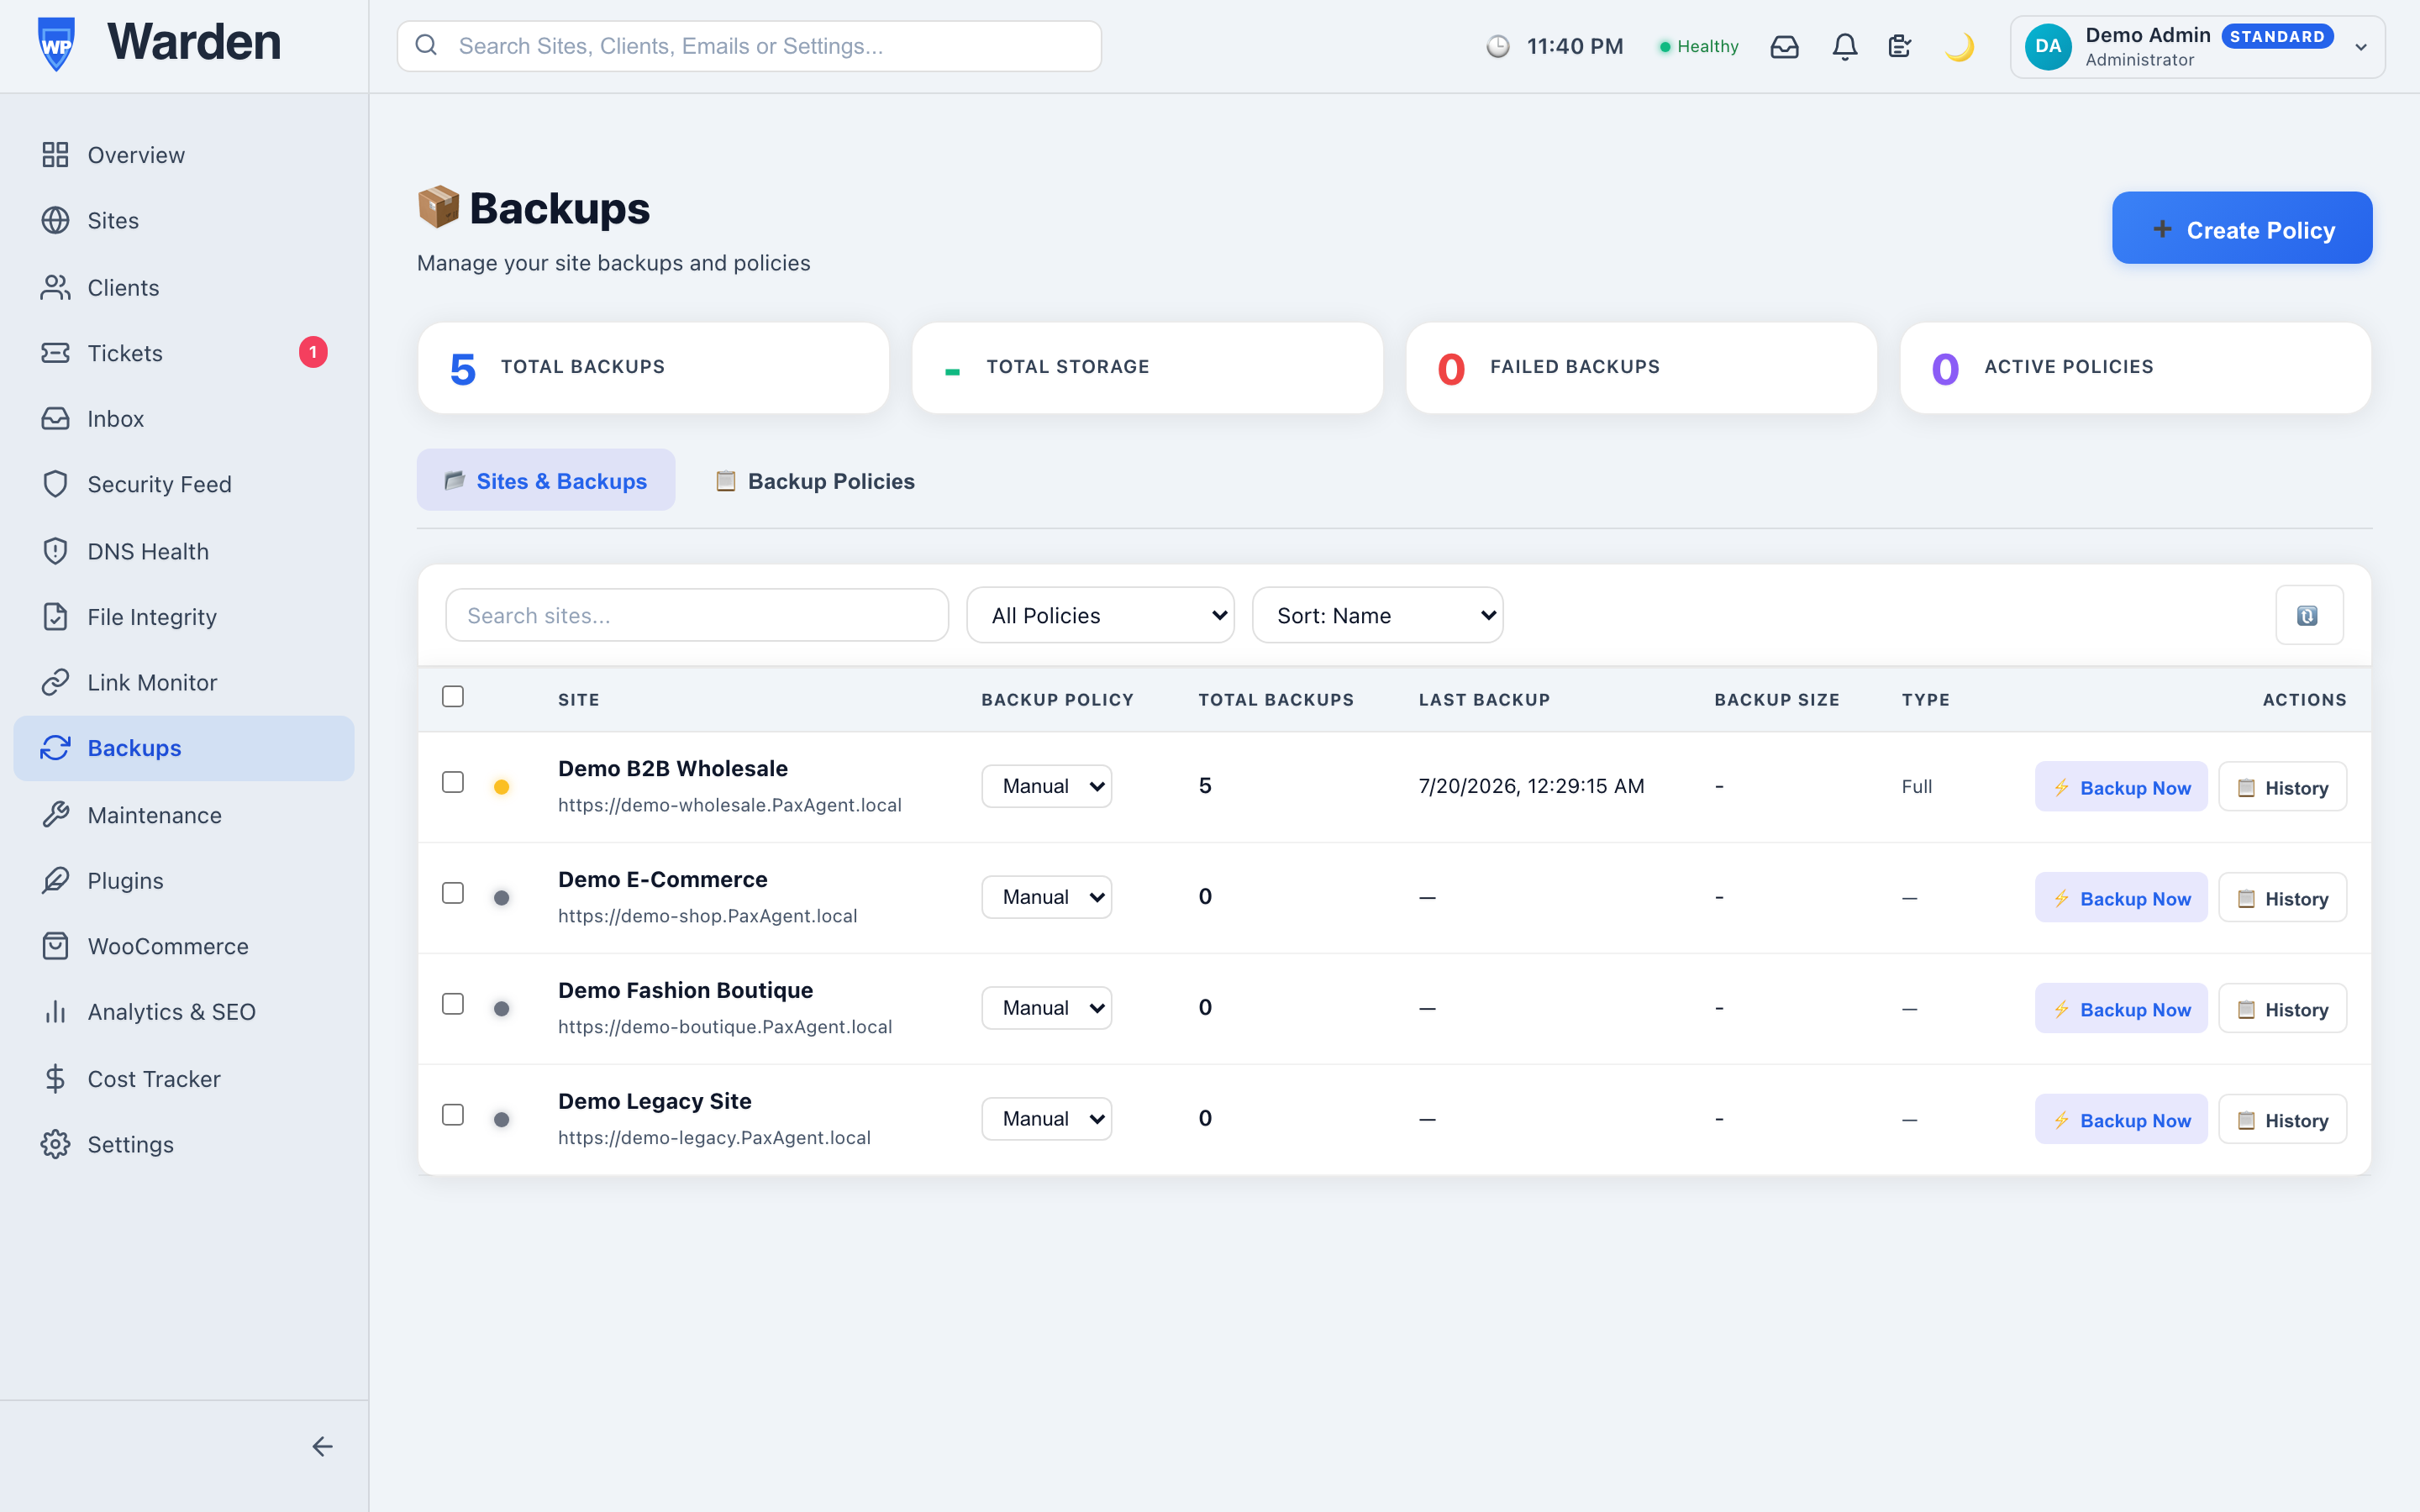
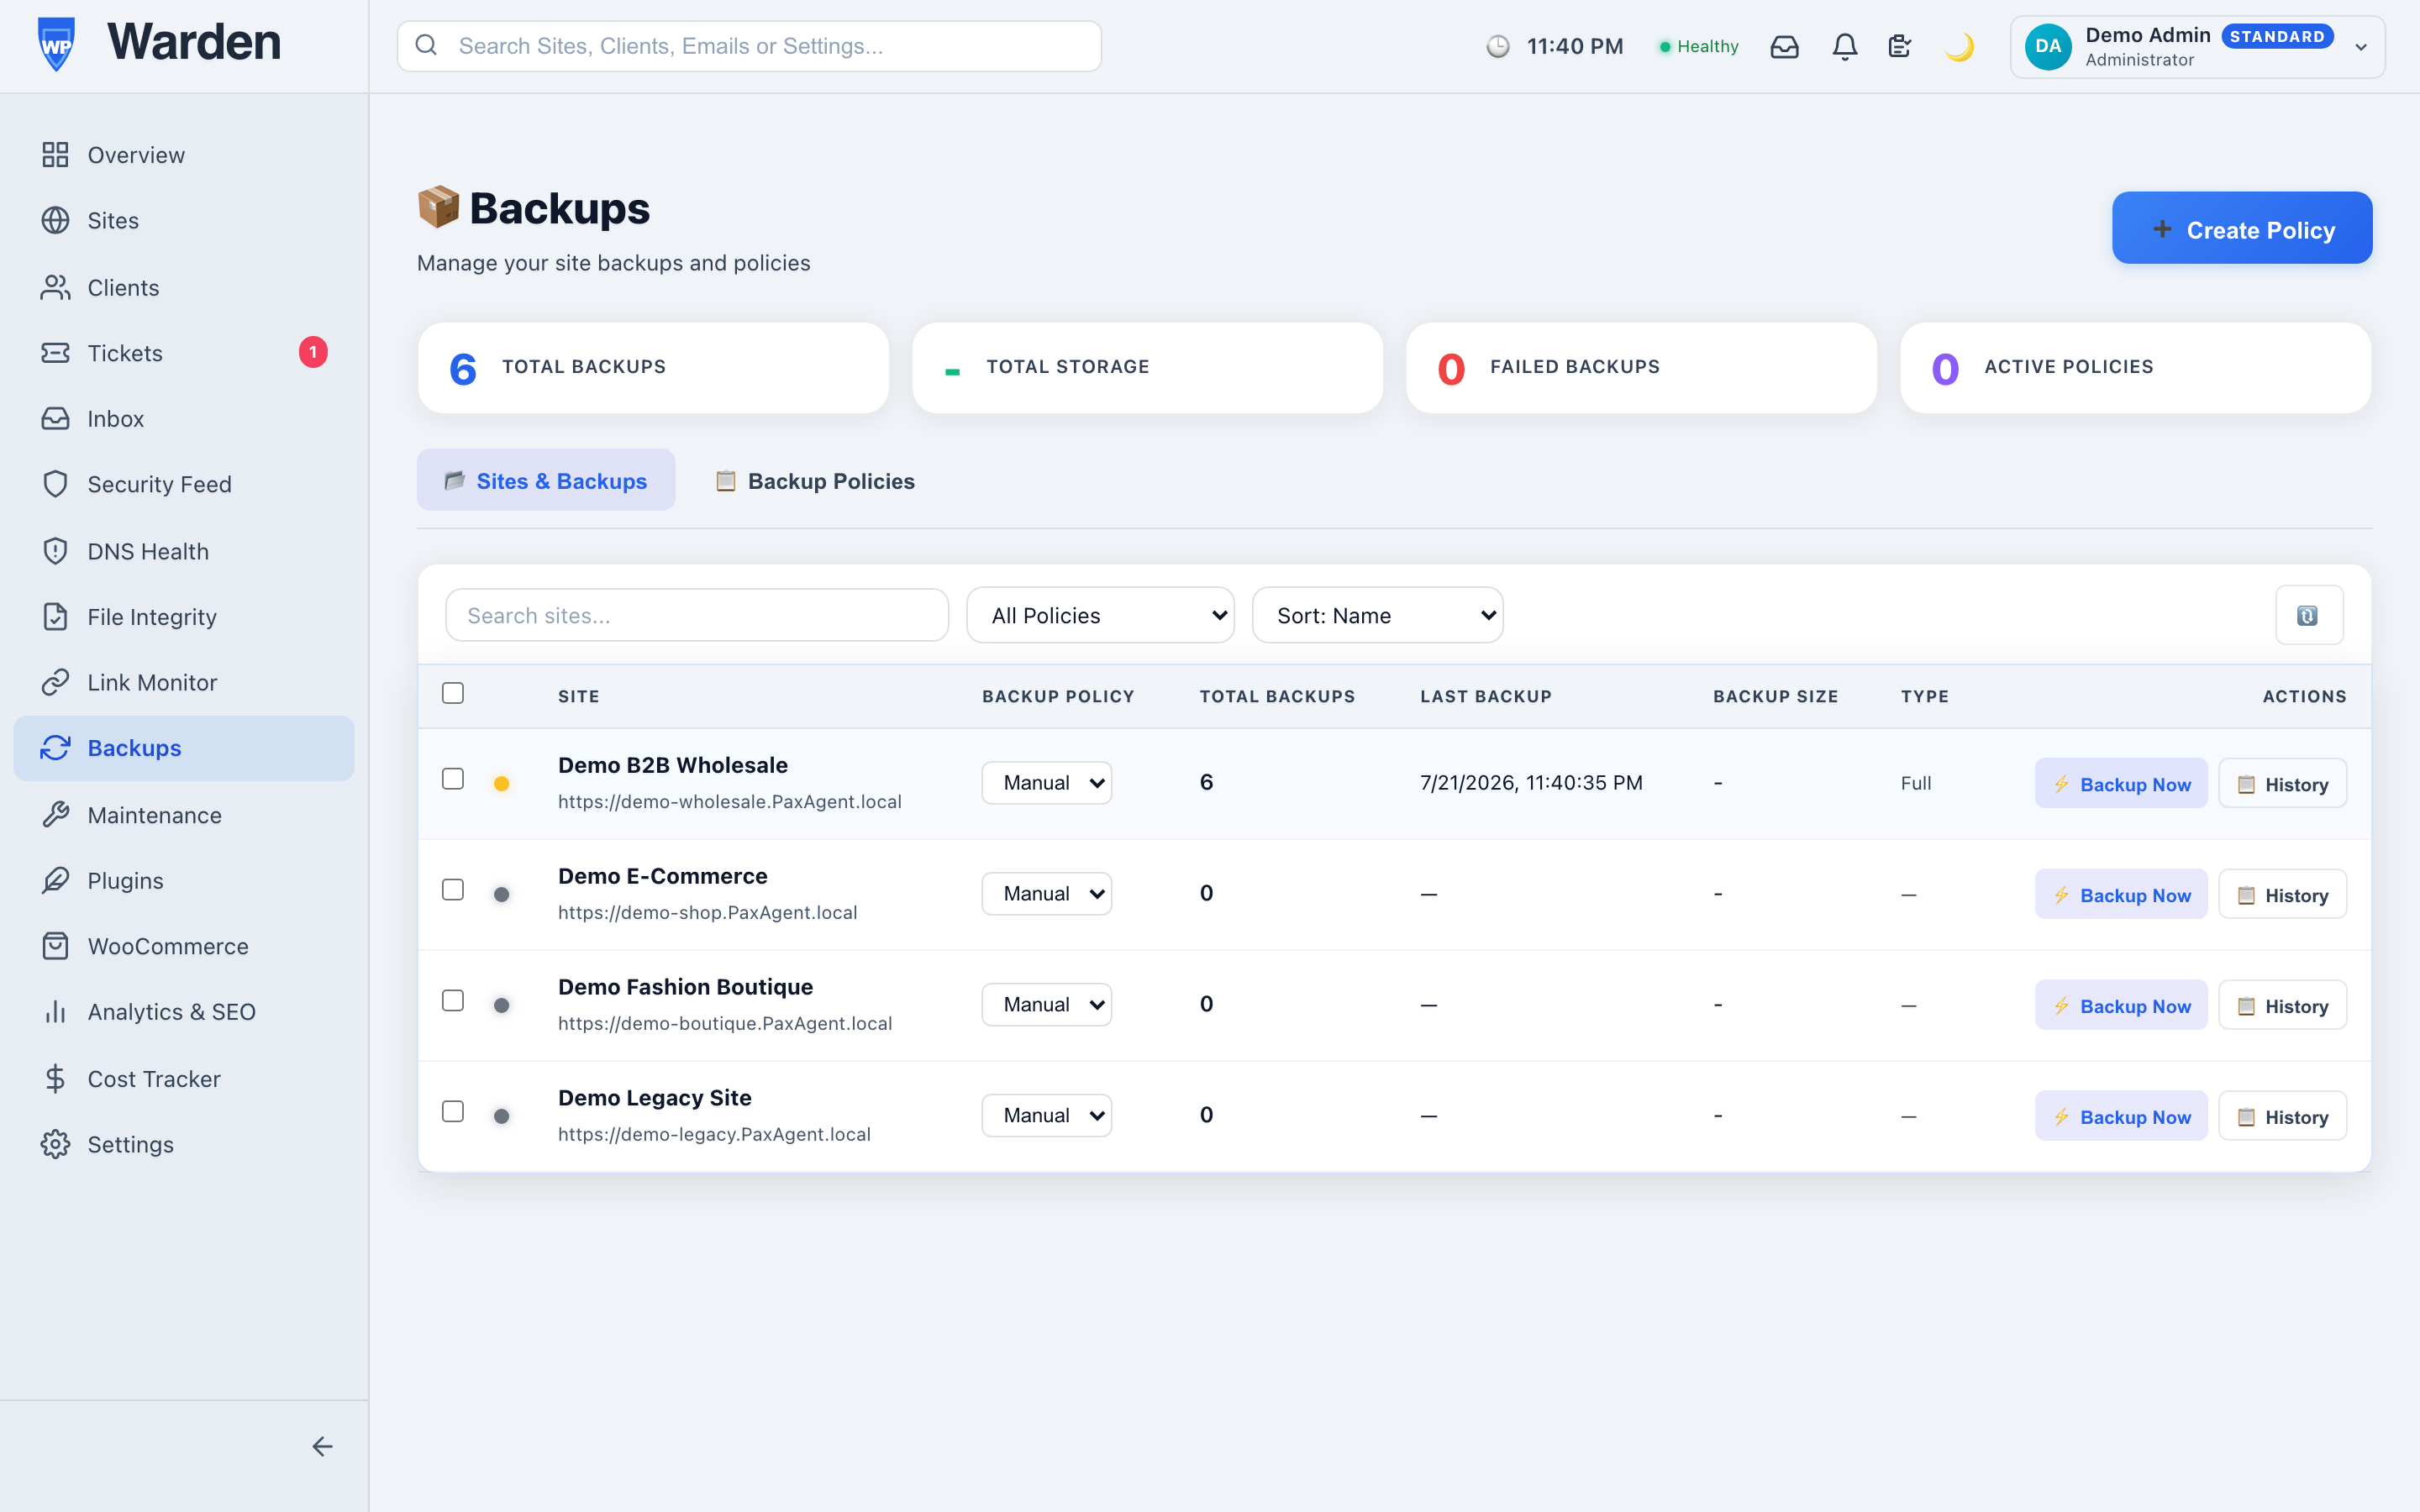
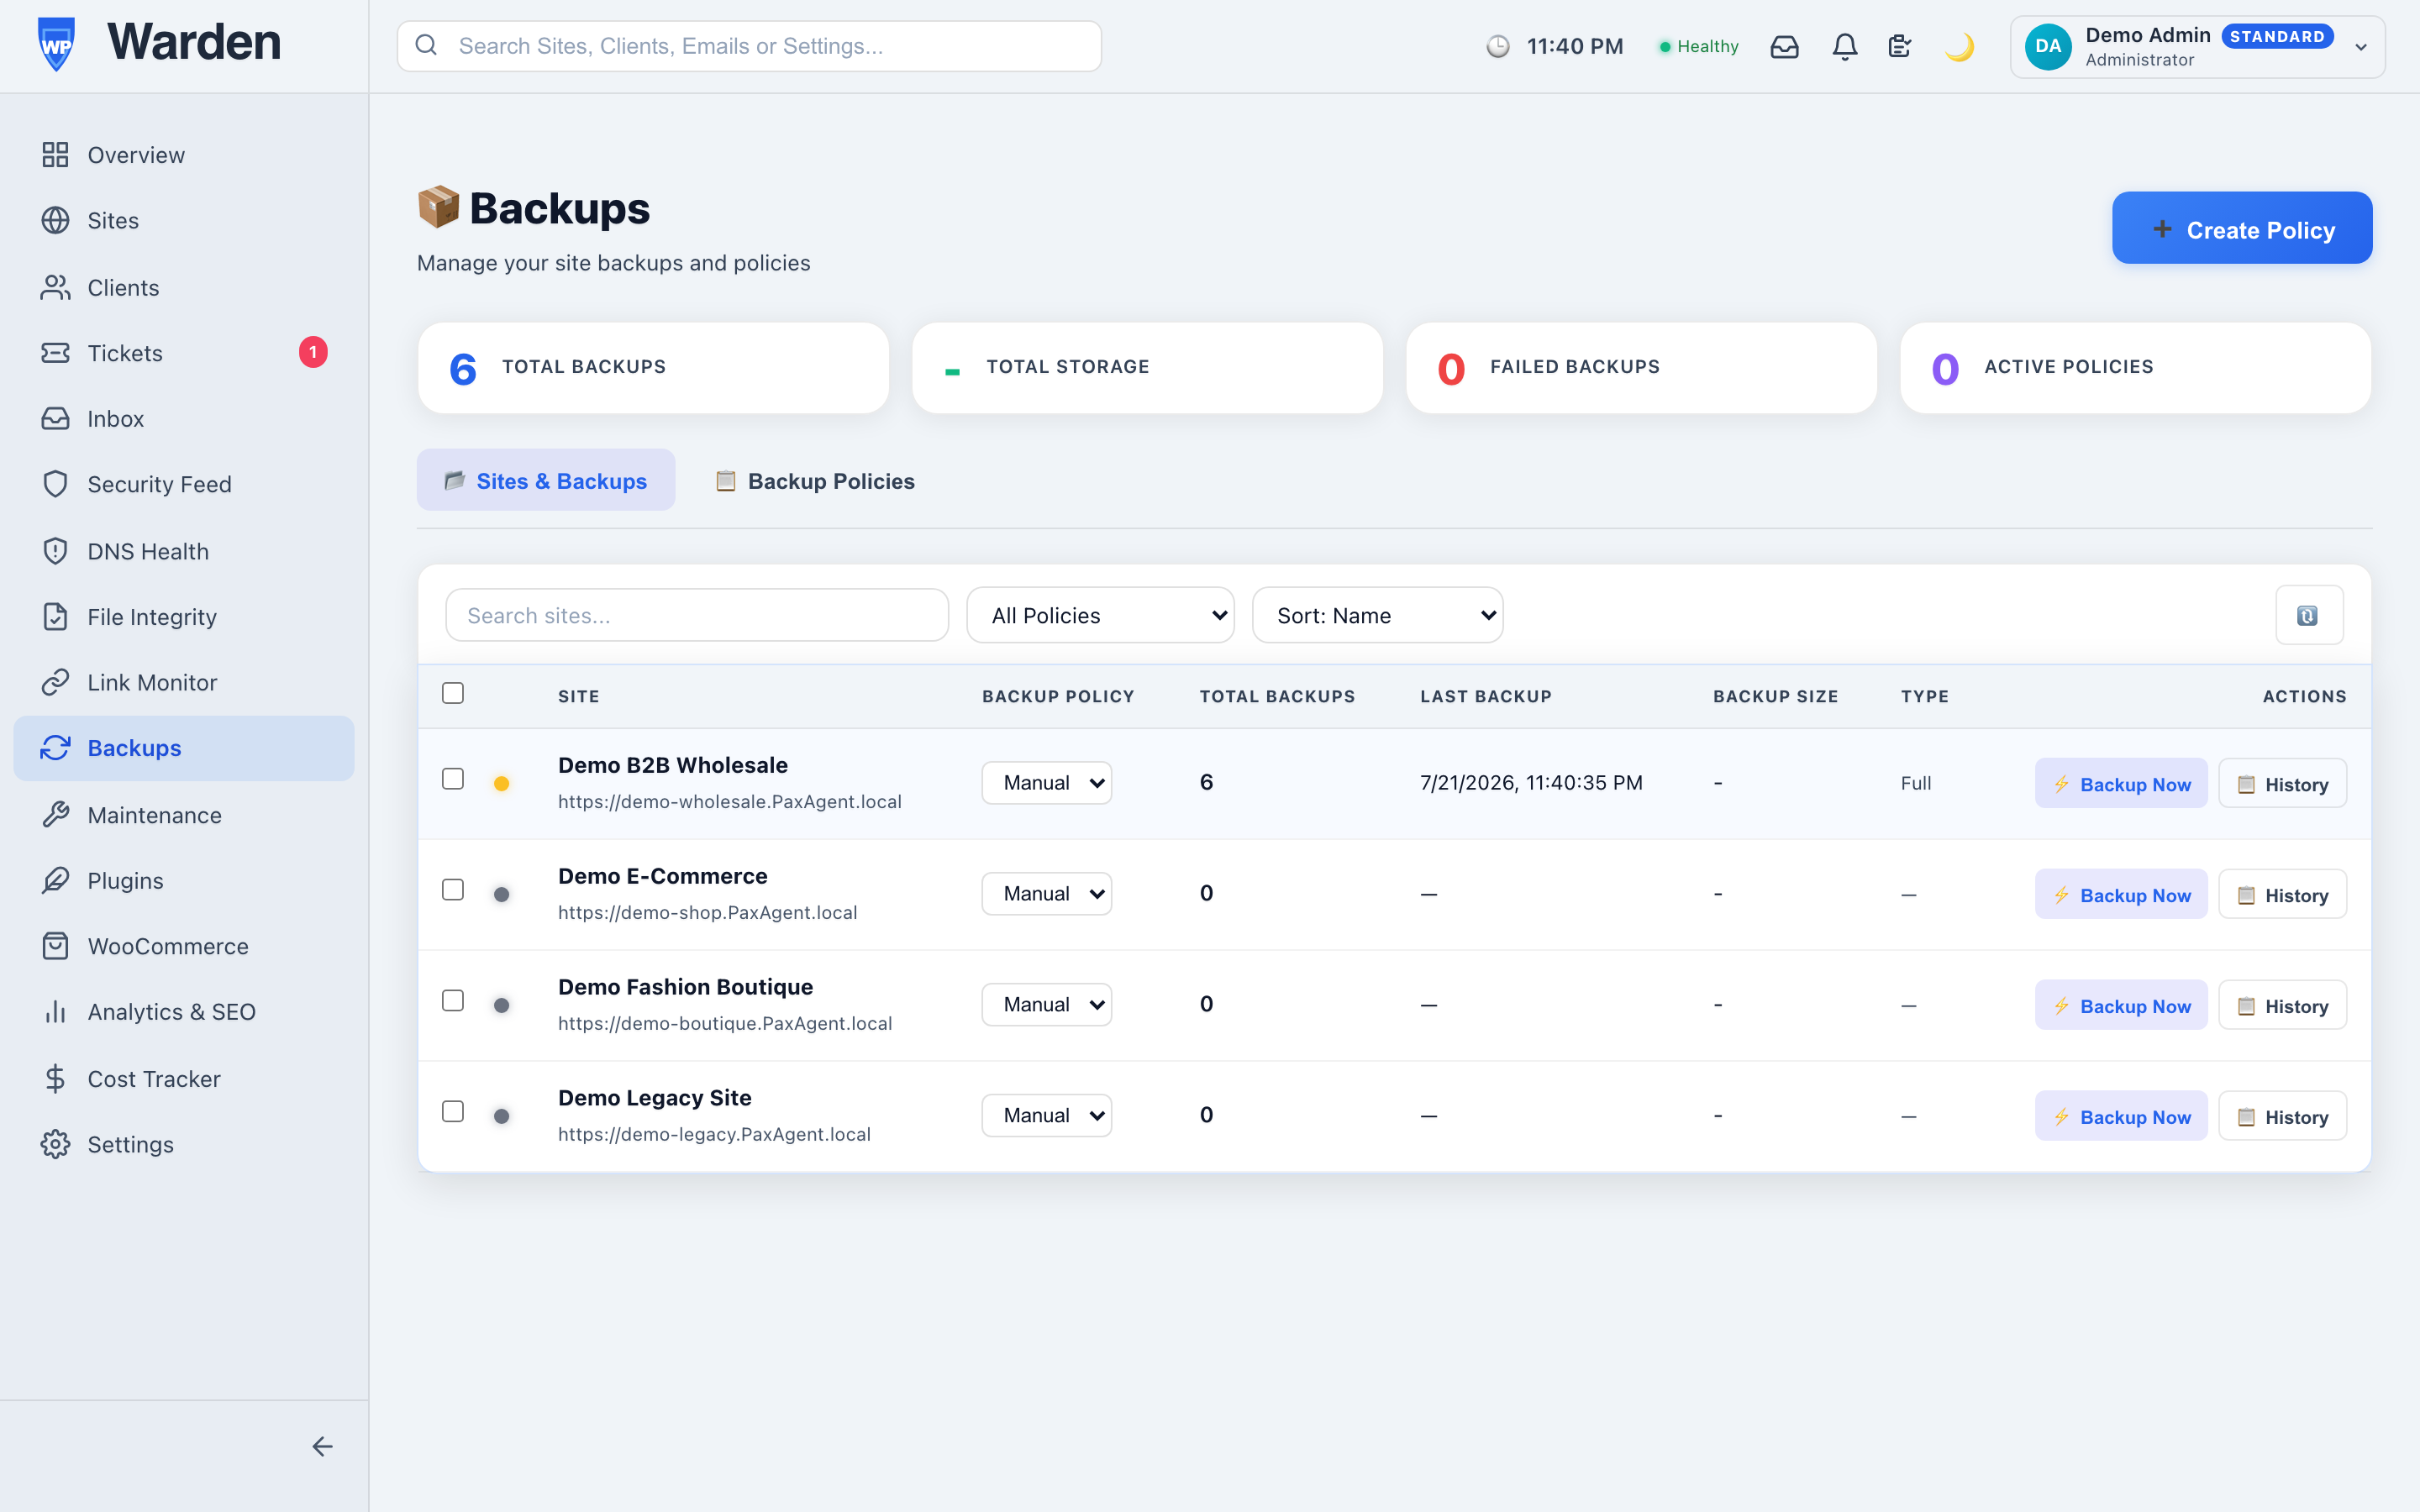
Click Backups in the sidebar. Select the site from the site dropdown at the top. Click Trigger Backup. -
Option B — From the Site Detail page
Go to Sites, click the site name, scroll to the Backup Card, and click Backup Now. -
Wait for the backup to complete
The backup entry appears in the history list with status Pending → In Progress → Completed. Large sites may take several minutes. -
Check the result
Once the status shows Completed, the backup size and storage region are displayed. You can now download or restore it.
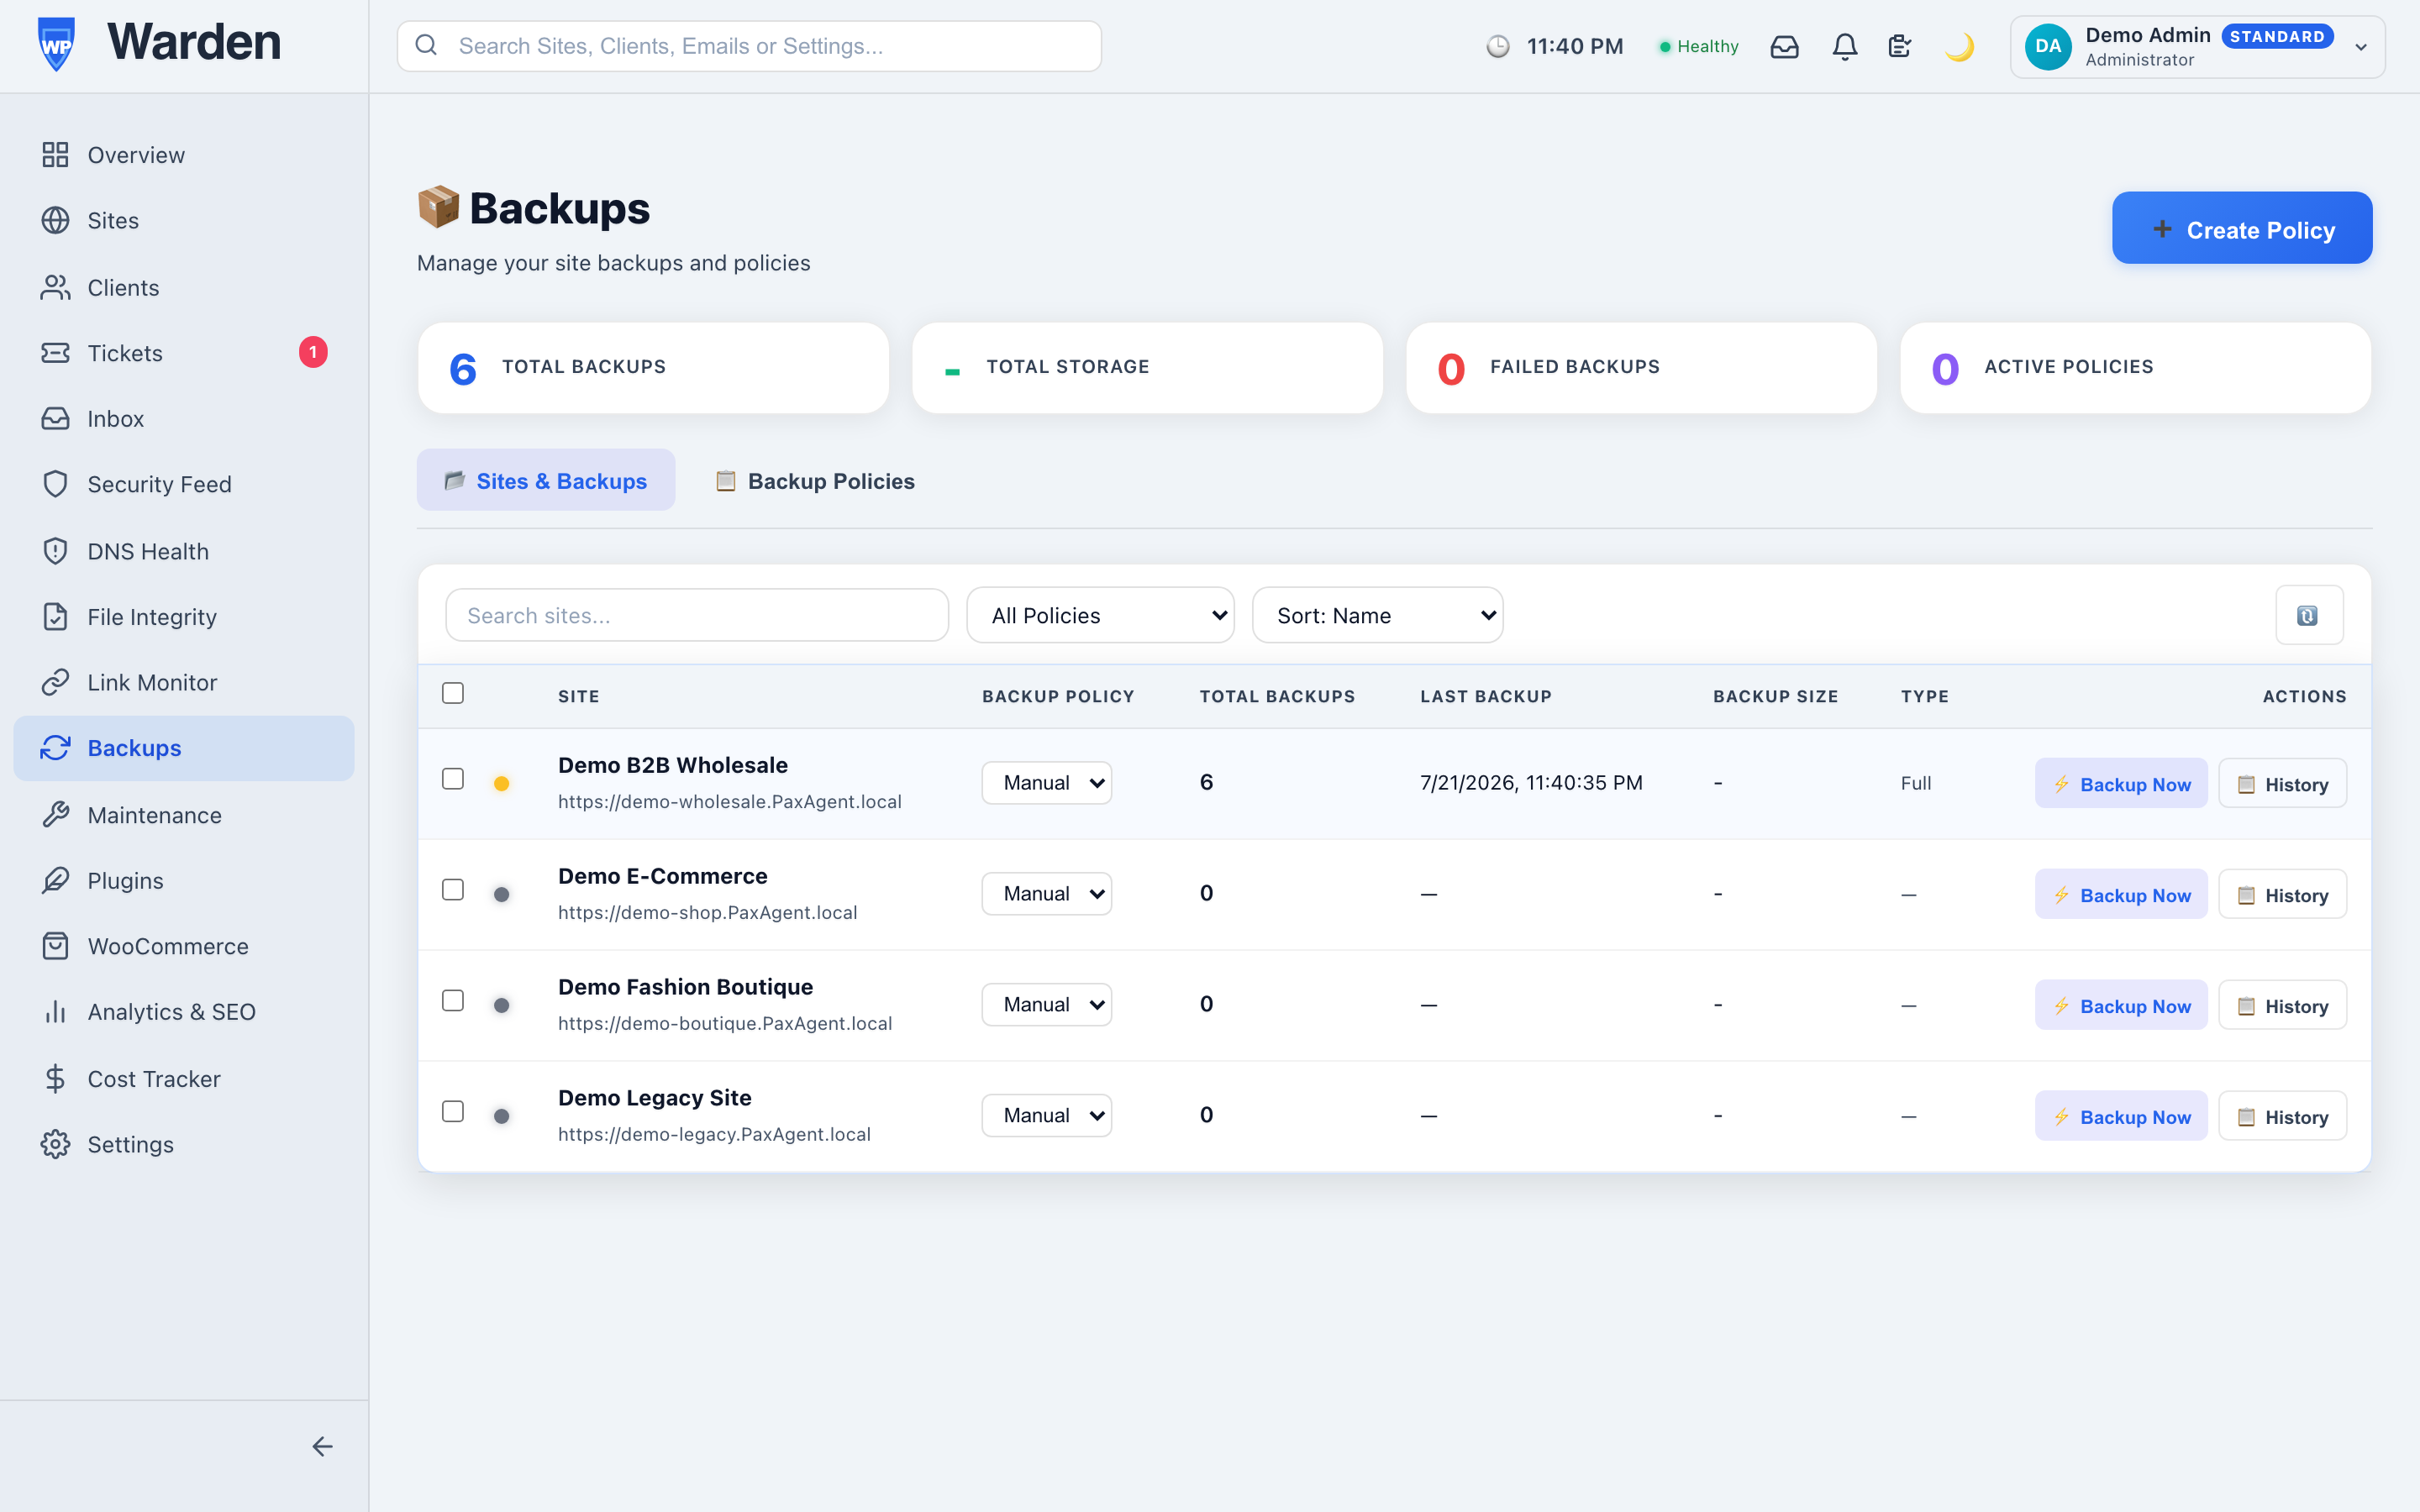
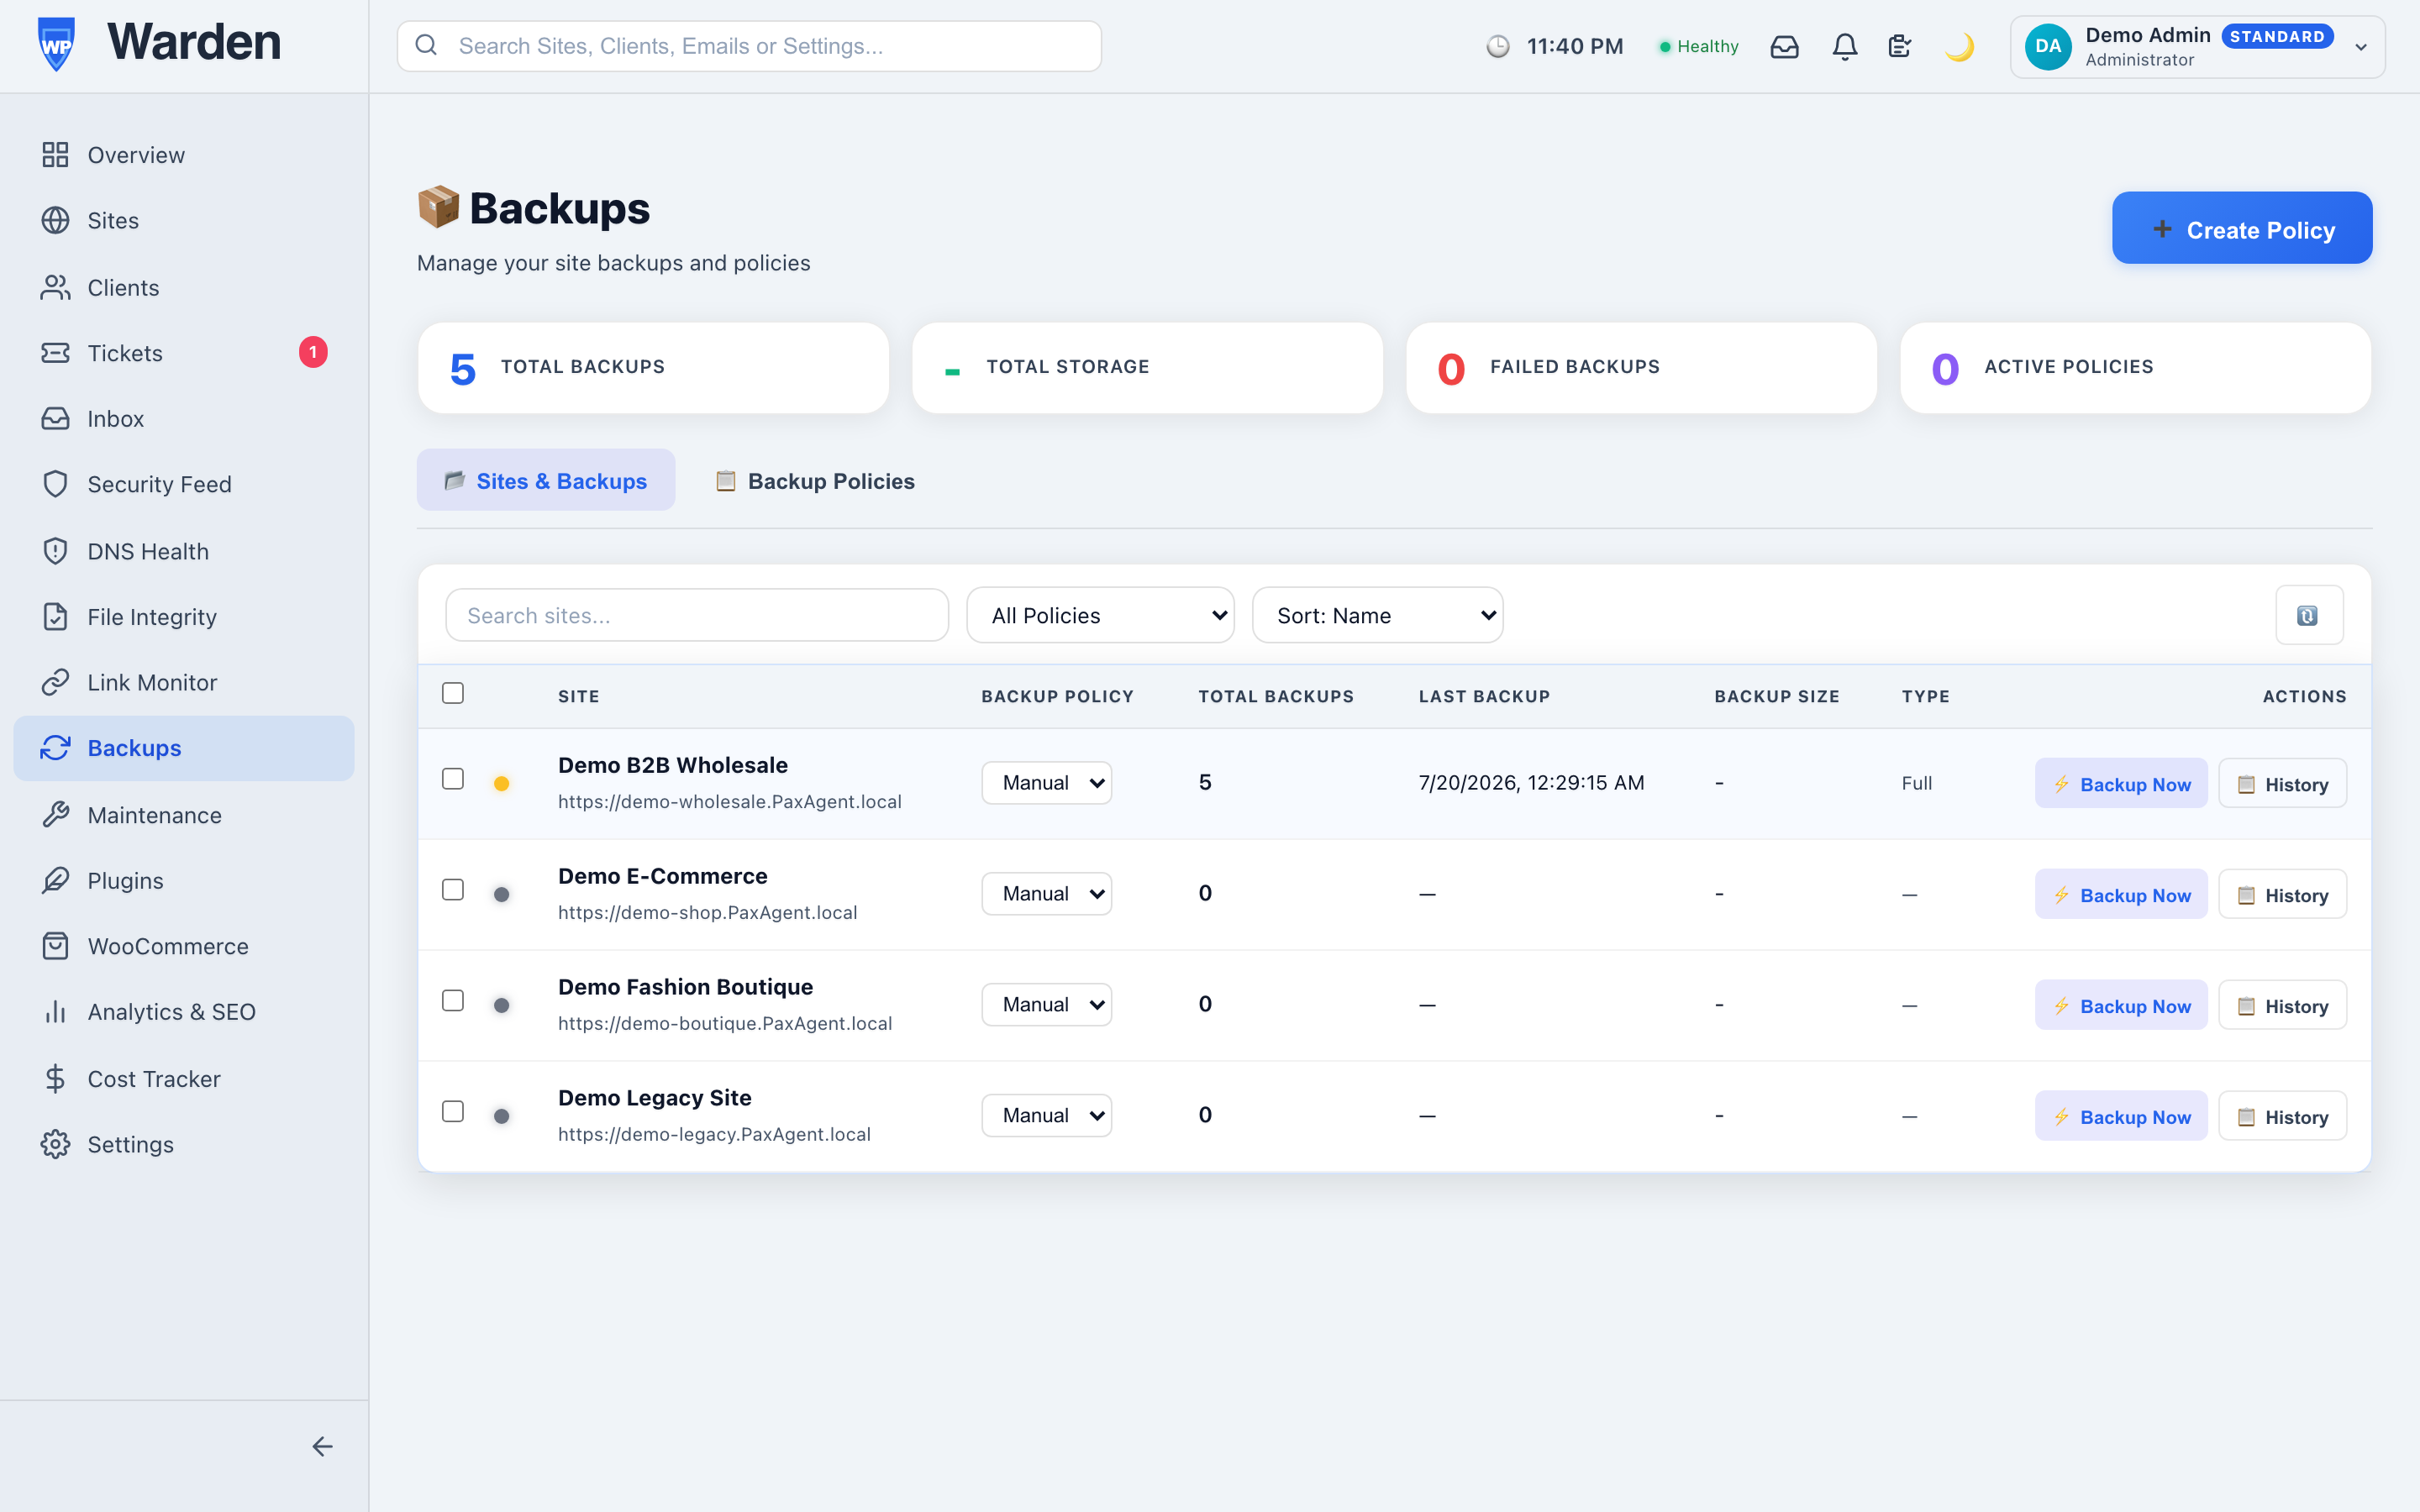 Screenshot: Backups page with “Trigger Backup”
button
Screenshot: Backups page with “Trigger Backup”
button
The backup page showing the site selector, Trigger Backup button, and the backup history table.
Always create a manual backup before applying major updates (WordPress core, premium plugins) to give yourself a rollback point.
How to schedule automatic backups
AutomationCreate reusable backup templates and assign them to sites. WP Warden automatically runs backups on your chosen schedule and retains them for the configured number of days.
-
Go to Backups
Click Backups in the sidebar. -
Click “+ New Template”
The backup template creation form opens. -
Name your template
Give it a descriptive name like “Daily Full Backup” or “Weekly eCommerce Backup”. -
Configure the backup settings
- Frequency: Daily, Weekly, or Monthly
- Retention: Up to 90 days for weekly/monthly schedules; daily backups are always capped at 7 days
- Incremental backups: On by default — after the first full backup, only changed files are re-uploaded (the database is always backed up in full every time). Set how often to rebuild a fresh full backup (default every 7 days) to bound how far back a restore has to replay — capped at your retention period, since a rebuild interval longer than retention would never actually get pruned on schedule
- Keep a copy in WP Warden storage: On by default — turn off if you only want the off-site destination below to hold a copy
- Storage region: EU or Local (stored on the WordPress server) — US storage is temporarily unavailable
- Local backups to keep on site: How many recent backup archives stay on the WordPress server itself for instant Time Machine browsing and restore (default 3)
- Include database: Yes / No
- Include WordPress core files: Yes / No
- Include wp-config.php: Yes / No
- Include/Exclude paths: Whitelist or blacklist specific directories
- Backup notifications: Managed through your tenant-wide notification settings (Settings → Notifications for email, Settings → Integrations for Slack/Discord/Teams) rather than per template
- Update safety net: On by default — every single plugin, theme, or core update applied to a site on this policy takes its own small backup first, so it can be undone if something breaks. Turn it off to apply updates immediately with no pre-update snapshot
-
Save the template
Click Save Template. The template is now available to assign to sites. -
Assign the template to a site
On the Backups page, select a site from the dropdown. A template assignment section appears below. Choose your template from the dropdown and click Save. -
Verify the schedule
The next scheduled run time is shown next to the template assignment. WP Warden will run the backup automatically at the configured interval.
 Screenshot: Backup template creation form
The form showing frequency, retention, storage region, local retention count, and include/exclude options.
One policy per site: Each site can have one active backup policy at a time — creating a new one replaces the site’s existing policy. Retention can be set from 1 to 90 days for weekly/monthly schedules; daily schedules are always capped at 7 days, regardless of what’s entered, since a daily backup chain never needs to reach back further than that.
How to restore a site from a backup
RecoveryRoll back a WordPress site to any completed backup snapshot. WP Warden handles the restoration automatically once you confirm.
-
Go to Backups and select the site
Click Backups in the sidebar and choose the site from the dropdown. -
Find the backup you want to restore
The backup history table shows all completed backups for this site, sorted by date. Identify the correct restore point by date, size, and type. -
Click the “Restore” button on that backup row
A confirmation dialog appears explaining what will be restored. -
Confirm the restore
Click Confirm Restore to start the restoration. -
Wait for the operation to complete
The restoration usually starts within a few minutes. Large sites may take longer to fully complete. A notification appears once the restore is finished.
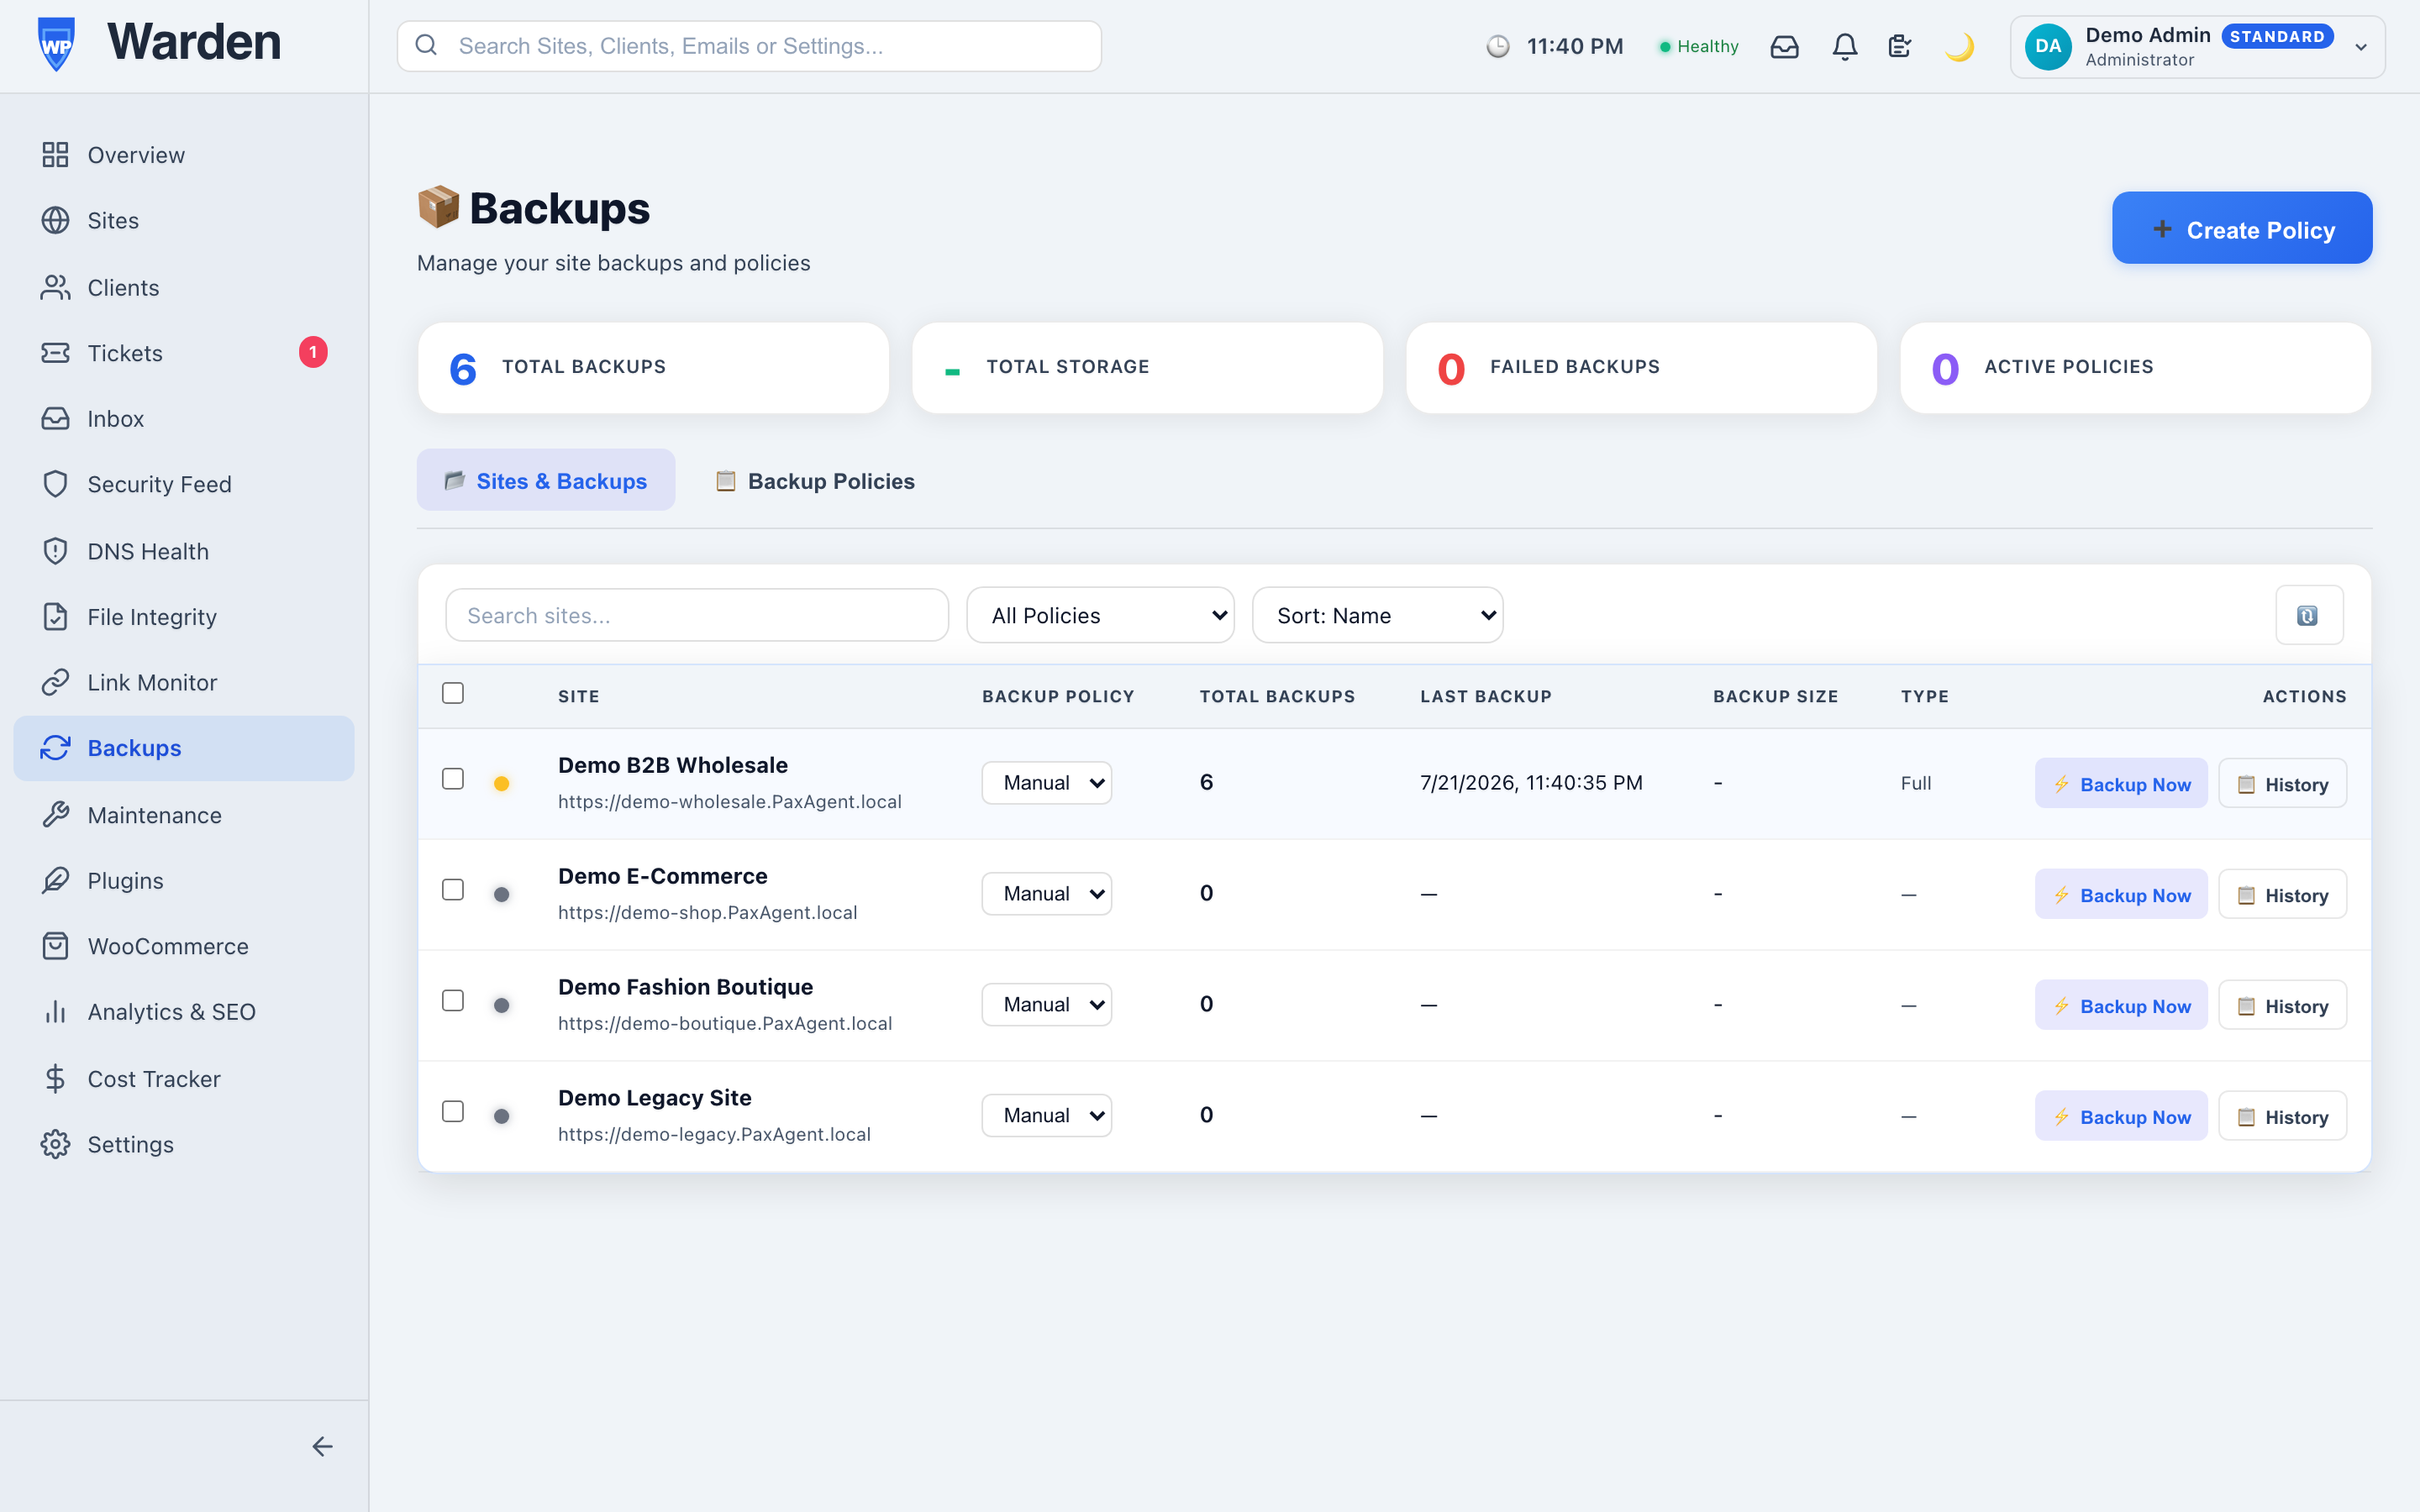
 Screenshot: Backup history table with Restore
button
Screenshot: Backup history table with Restore
button
The table row showing date, size, type, status, and the Restore button.
A restore overwrites the current site files with the backup contents. Consider creating a fresh manual backup of the current state before restoring an older snapshot, so you can undo the restoration if needed.
How to restore individual files with Time Machine
RecoveryRestoring a full backup isn’t always what you need — sometimes a single file, plugin, theme, or page just needs to go back to how it was. Time Machine lets you browse any completed backup and restore only what you select, without touching the rest of the site.
-
Open the backup you want to browse
Click Backups in the sidebar, choose the site, and find the completed backup you want to restore from in the history table. -
Click “Browse files”
If the backup is still stored locally on the site (its recent hot-backup copies), WP Warden builds the file catalog instantly. If the backup has already been moved off-site only, Time Machine shows it as unavailable instead of downloading it back down first. -
Select what you want to restore
Search by name, filter by type (Plugins, Themes, Files, Media, Posts, Pages), and sort A→Z or Z→A. Check the box next to each item you want to bring back — select as many or as few as you need. -
Click “Restore selected”
Only the items you checked are restored from the backup — everything else on the live site is left untouched. A summary shows exactly what succeeded and what, if anything, failed.
 Screenshot: Time Machine file browser
The Time Machine modal showing a searchable, grouped list of files, plugins, themes, and database records with checkboxes, and a “Restore selected” button.
A flagged file on the File Integrity page also has its own one-click “Restore from local backup” action, pulling from the site’s own current local backup copy. Time Machine above works the same way — browsing and restoring only work for backups still stored locally on the site. For a backup that’s already been moved off-site only, Time Machine isn’t available for it.
Each backup shows a “Verified clean” or “Not verified” badge. This just reflects whether a recent file-integrity scan confirmed the site was free of suspicious changes around that time — “Not verified” doesn’t mean anything is wrong with the backup itself, it’s still fully restorable.
How to download a backup file
File AccessDownload a completed backup as a ZIP file to your computer for offline storage or manual migration.
-
Go to Backups
Click Backups in the sidebar and select the site. -
Find the completed backup in the history table
Only backups with status Completed have a Download button. -
Click “Download”
Your browser downloads the backup as a ZIP file. This works only for backups stored in the US or EU cloud region. Backups with storage region set to Local stay on the WordPress server and have no Download option in the dashboard — trigger a fresh cloud-region backup if you need a downloadable copy.
 Screenshot: Backup row with Download button
A completed backup row showing size, storage region, and the Download button.
Download backup files periodically and store them in an off-site location (e.g. a shared drive or external storage) for an extra layer of protection.
How to configure the Google Drive off-site backup add-on
Off-Site Add-OnUse the Google Drive destination template to guide customers through a simple off-site backup setup that uploads a copy of each backup ZIP file to their Drive account.
-
Open the destination template
Go to Backups, create a new template or edit an existing one, then choose Google Drive Add-On in the Backup Destination section. -
Name the connection and destination folder
Enter a clear label such as Client Google Drive and choose a destination folder like /WP Warden Backups/Client Name. -
Choose the copy behavior
Select whether WP Warden should mirror only the latest backup, append every new backup indefinitely, or keep a rolling set of the most recent backups for this client. -
Save the template
Save the template and assign it to the site — the customer completes a simple guided Google sign-in to finish connecting their Drive. -
Complete customer authorization
During onboarding, the customer signs into Google Drive and approves access. Future backup copies follow the saved template automatically.
 Screenshot: Google Drive destination template
The policy modal showing the Google Drive add-on card, folder path field, and copy behavior selector.
Create a dedicated folder for each client so archived backups stay organized and easy to restore during emergencies. By default, WP Warden also keeps its own copy of every backup alongside the Drive copy — turn off “Keep a copy in WP Warden storage” in the policy if you only want the Drive copy kept.
If the customer changes their Google password or revokes access from their own Google Account settings, the destination flips to a “Needs Attention” status with a Reconnect action on the Backups page — off-site copies pause until someone completes that sign-in again. Local/other-destination copies in the same policy keep running normally.
How to configure the OneDrive off-site backup add-on
Off-Site Add-OnUse the OneDrive destination template to prepare a Microsoft 365-friendly off-site archive path that customers can authorize without advanced setup work.
-
Select the OneDrive template
Open Backups, start a new template or edit an existing one, and select OneDrive Add-On under Backup Destination. -
Set the connection label and archive folder
Add a friendly name such as Client OneDrive and confirm the archive folder, for example /Apps/WP Warden Backups/Client Name. -
Choose how archives are copied
Pick the copy policy that fits the customer: latest-only mirror, append-only archive growth, or a rolling set with predictable retention. -
Save, assign, and authorize
Save the template, assign it to the site, and have the customer approve access with their Microsoft 365 account to finish connecting OneDrive — backup copies start syncing off-site as soon as that authorization completes.
 Screenshot: OneDrive destination template
The policy modal showing the OneDrive add-on card, destination summary, and guided setup options.
OneDrive works best when each customer authorizes a dedicated archive folder so restore files remain separated from other agency documents. By default, WP Warden also keeps its own copy of every backup alongside the OneDrive copy — turn off “Keep a copy in WP Warden storage” in the policy if you only want the OneDrive copy kept.
If the customer changes their Microsoft 365 password or revokes access from their own Microsoft account settings, the destination flips to a “Needs Attention” status with a Reconnect action on the Backups page — off-site copies pause until someone completes that sign-in again. Local/other-destination copies in the same policy keep running normally.
How to set up a maintenance window
AutomationMaintenance windows let WP Warden automatically run updates, backups, and health checks for a site during scheduled low-traffic hours — no manual intervention required.
-
Go to Maintenance
Click Maintenance in the sidebar. -
Click “+ New Window”
The maintenance window configuration form opens. -
Select the site
Choose which WordPress site this window applies to. -
Give it a label
For example: “Sunday 2AM Maintenance” or “Weekly Client A Update”. This label appears in logs and notifications. -
Configure the schedule
- Days of Week: Check the days this window runs (e.g. Sunday only)
- Start / End Time: Set the UTC time range (e.g. 02:00–04:00)
-
Choose what to run during the window
- Auto-backup before changes: Creates a backup before any updates run, following the site’s assigned backup policy (retention, storage region, and destination) when one is configured
- Auto-update plugins: Applies all available plugin updates
- Auto-update themes: Applies all available theme updates
- Auto-update WordPress core: Applies available core updates
- Health threshold: After updates run, checks the site’s health score and automatically rolls back if it drops below this value (default 70)
- Email notification: Enter an address to receive a completion report
-
Enable the window and save
Toggle the window to Active and click Save. WP Warden will execute the window automatically on the next scheduled occurrence.
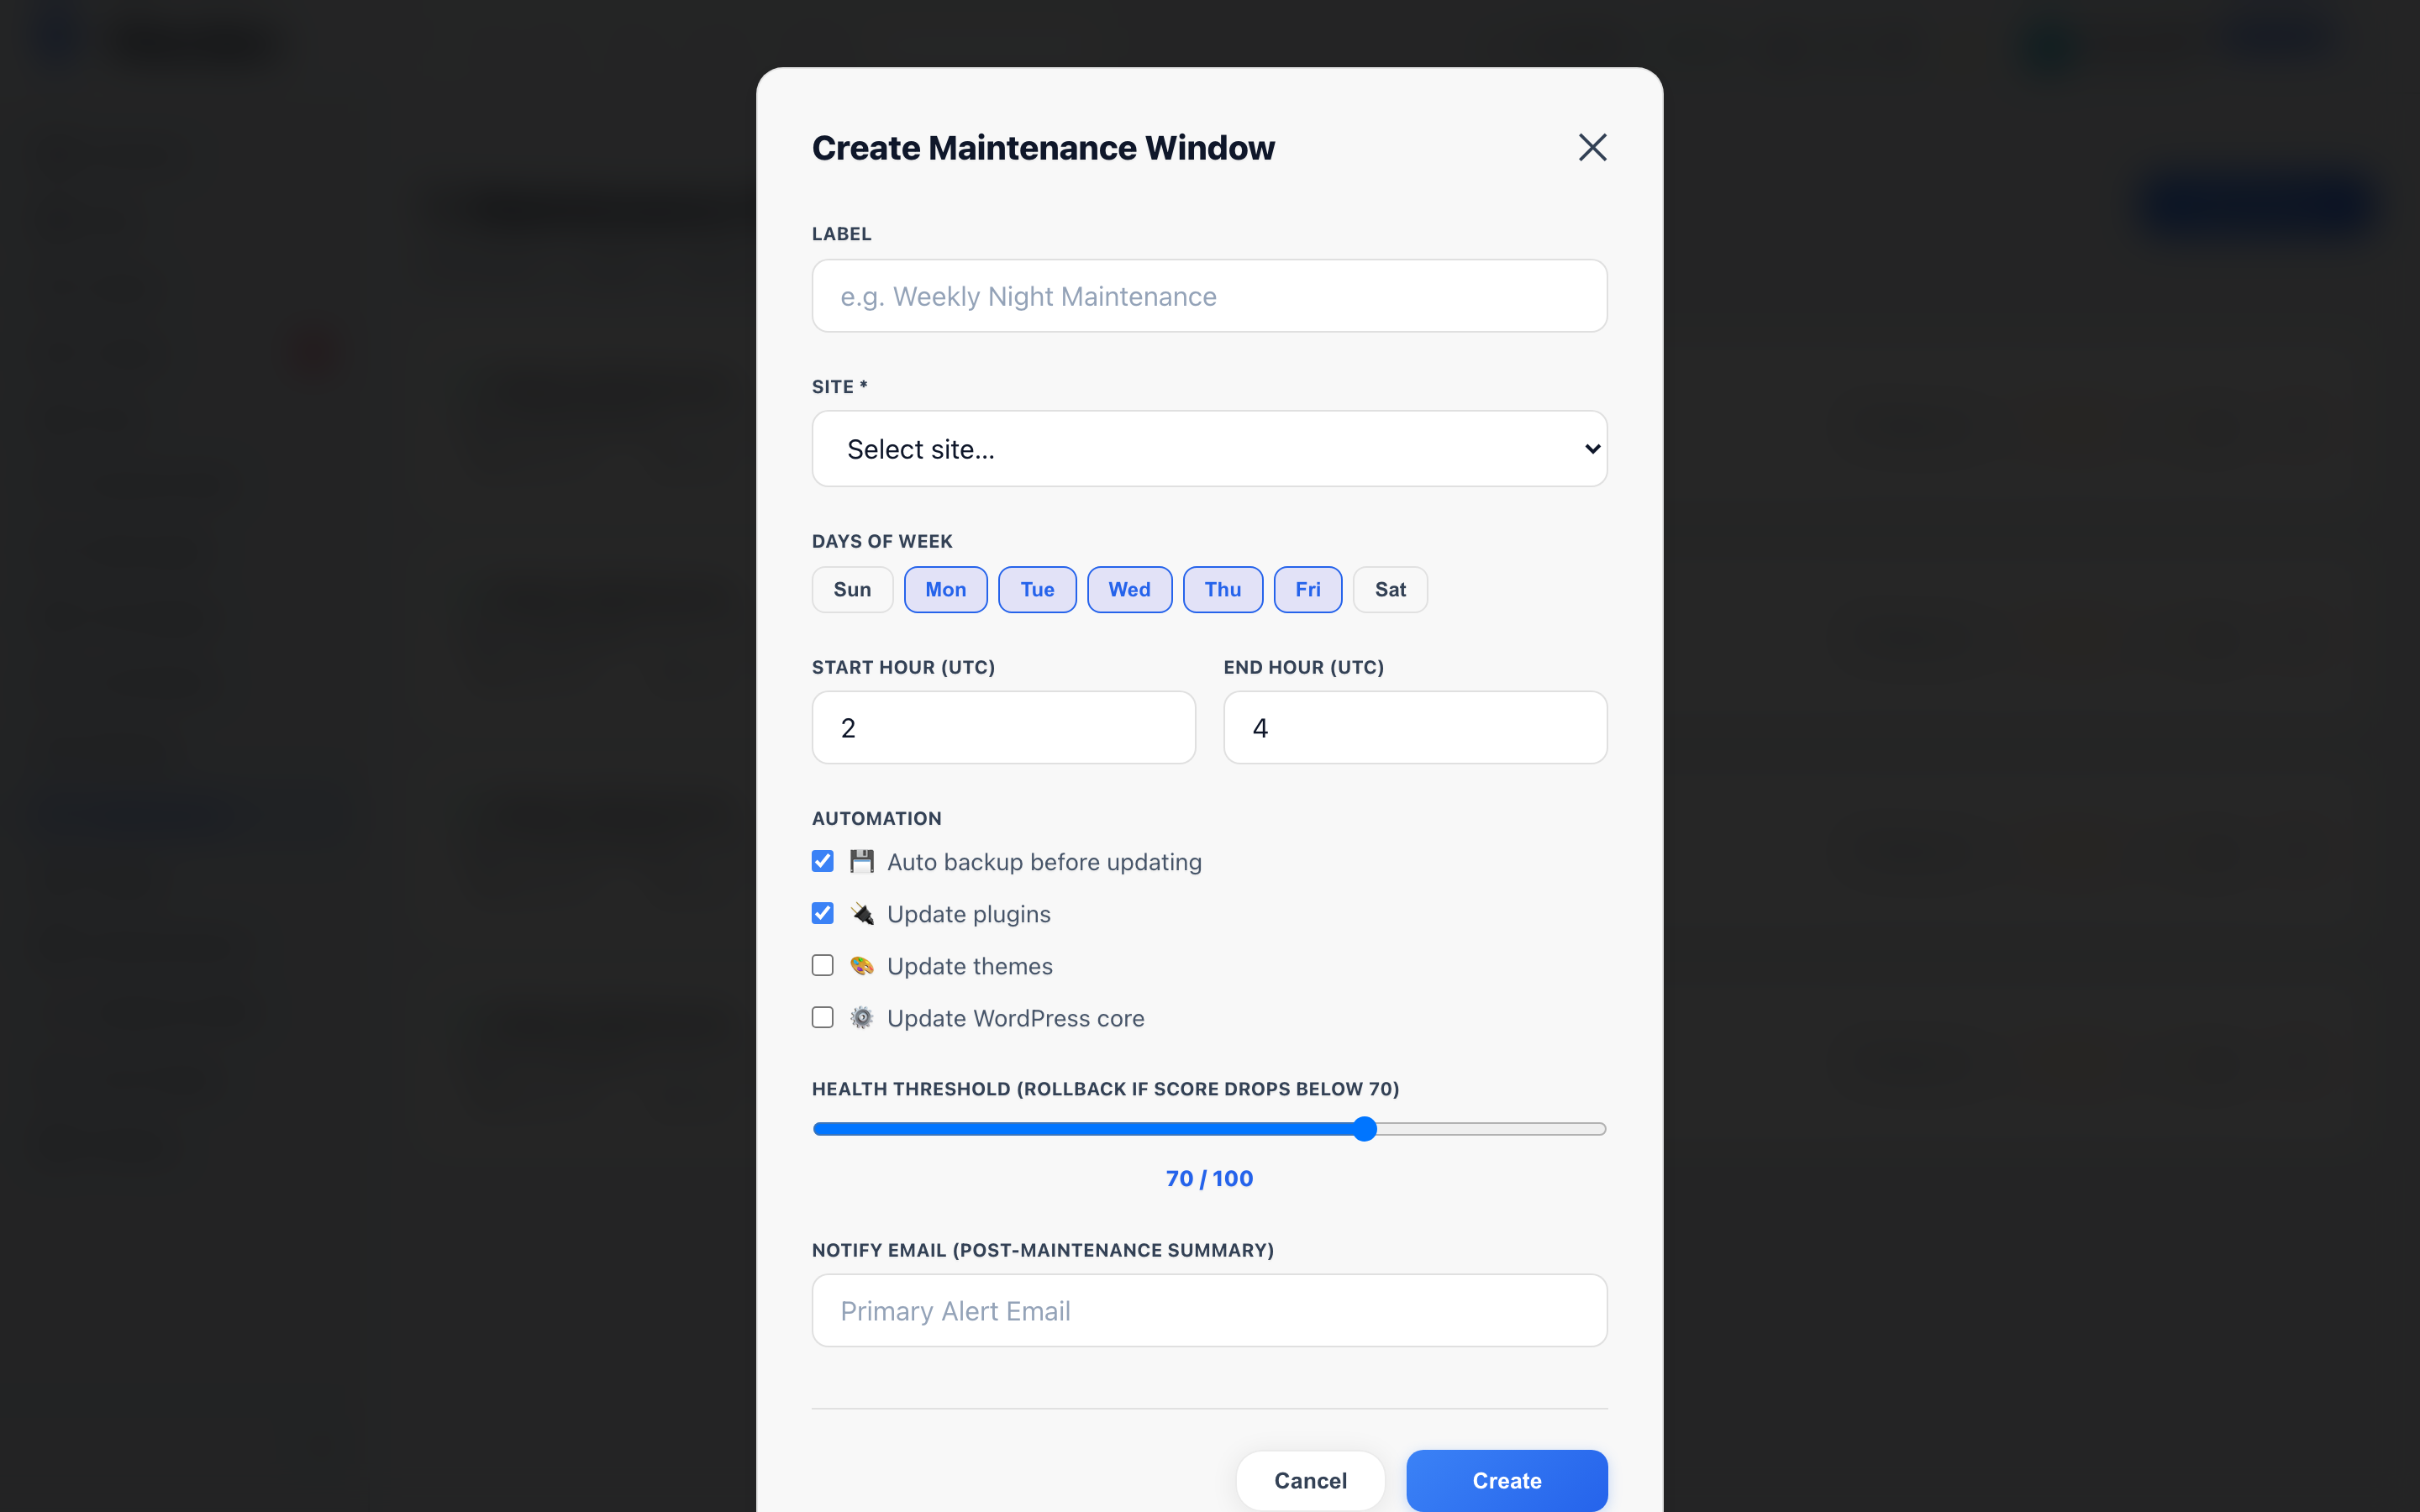 Screenshot: Maintenance Window creation
form
Screenshot: Maintenance Window creation
form
The form showing site selector, label, day/time schedule, task checkboxes, health threshold, and email notification field.
Every maintenance window execution is logged with start/end time, status, actions taken, and any errors. You can review these logs from the Maintenance page.
The health threshold doesn’t decide whether the window runs — it only decides whether to auto-roll back afterward. Set it to 80 or higher if you want WP Warden to undo the update the moment post-update health dips even slightly.
Managing several windows at once? Select multiple windows with the checkboxes on the Maintenance page, then use Bulk Edit to apply the same schedule, hours, timezone, automation, and health threshold to all of them at once (the same form as creating a new window), or Bulk Delete to remove them together.